Although all images are going to have slightly different sharpening needs, a regular workflow for sharpening will help you optimize your images consistently.
Now that we've covered all the mechanics of sharpening, let's put this all together with six simple steps for sharpening in Adobe Lightroom.
Starting With Lightroom's Defaults – 25-1-25-0:
Lightroom's default sharpening for images is as follows:
- Amount: 25
- Radius: 1
- Detail: 25
- Masking: 0
These are fairly conservative settings that are broad enough to work for most images in adding clarity and revealing detail. For these reasons, in my workflow, I keep these defaults and use them as a starting point.
Sharpening Workflow Example:
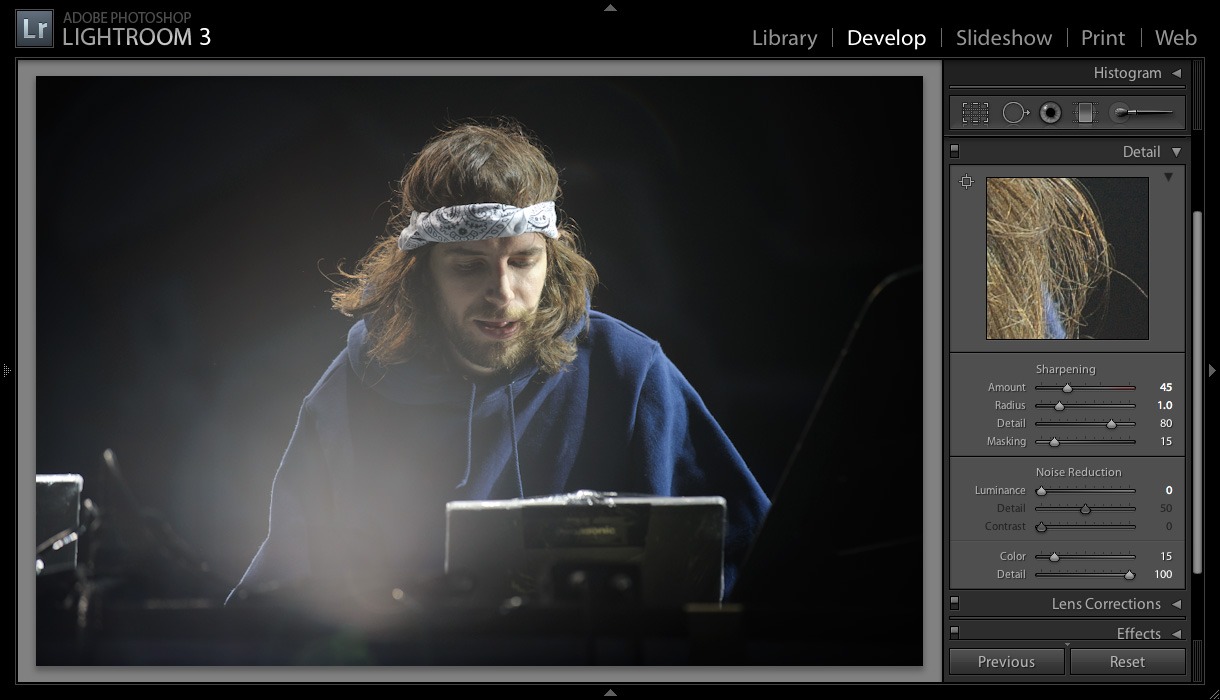
In this sharpening exercise, we'll take this shot of Girl Talk at The Bamboozle 2010.
This image was made with the Nikon D3 and Nikon 70-200mm f/2.8 – here are the details:
- ISO 400
- 1/1000
- f/4
- 200mm
Thanks to lens performance and the relatively low ISO, there's plenty of detail to look at in this show of Girl Talk – perfect for a little sharpening tutorial.
Step 1 – Identifying the Details:
Before adjusting any of the sliders for sharpening, I think that one of the key aspects of the process is to determine the key details and elements in the image that are most important to reading the image. Whether these are the fine details in a landscape or the eyes in a portrait, understanding this hierarchy will help you sharpen with purpose and efficiency.
Step 2 – Adjusting the Amount:
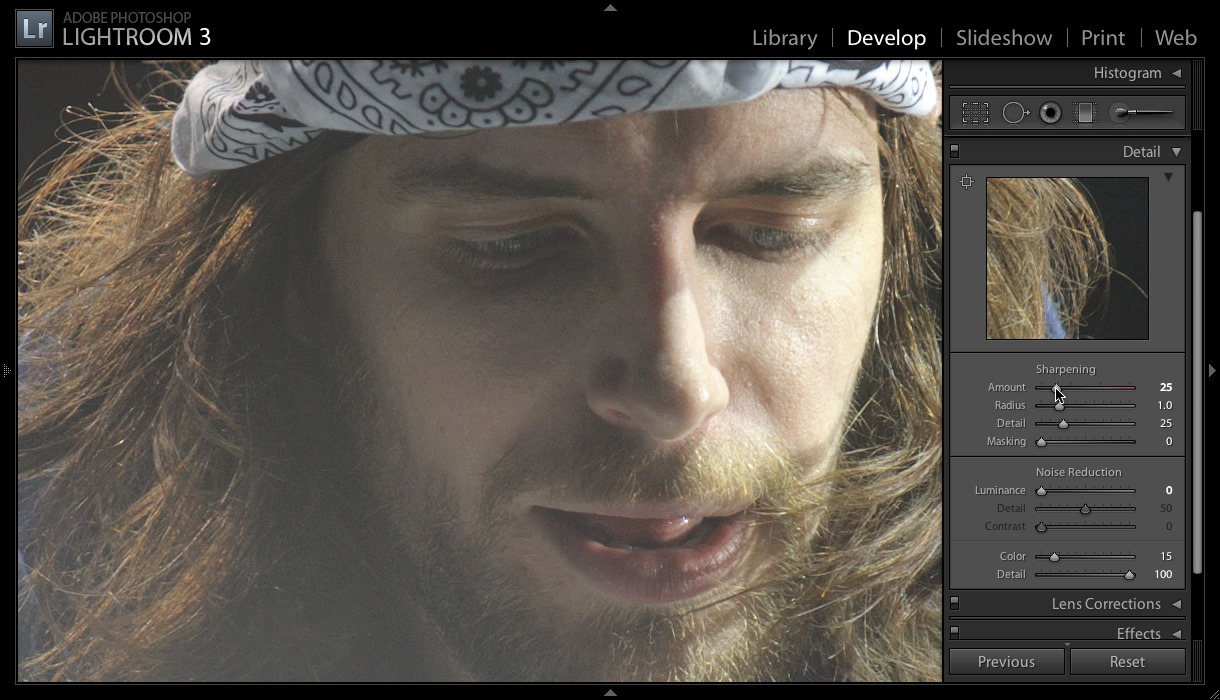
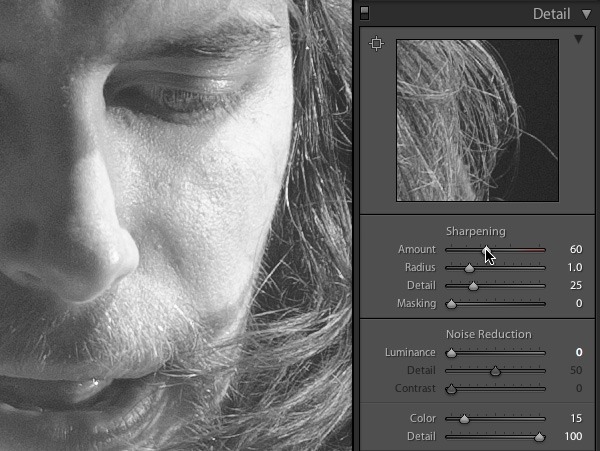
It's no coincidence that Adobe orders the sliders the way they are; the first variable I change is the overall strength of the sharpening using the Amount slider. I go back and forth between the preview mode and the full-color mode, and I aim for a rendering that emphasizes the levels of detail that are most important in the image.
Overall, my goal with this first adjustment is to get the key details looking good and “roughly” sharp. You don't have to worry about the perfect amount of sharpening yet; that's where the other sliders come in.
Step 2 – Adjusting the Radius:
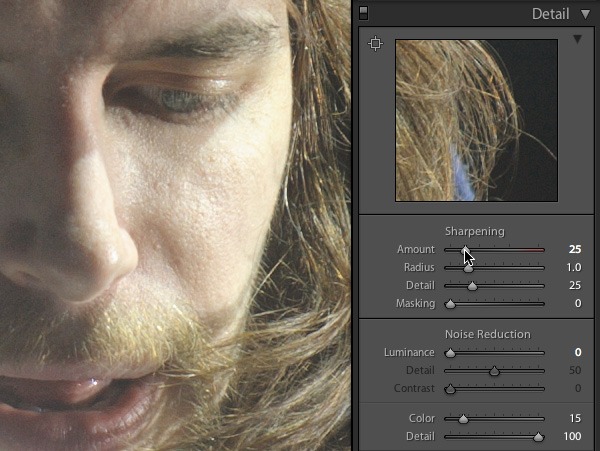
I find it most useful to start with a low Radius setting and move up from there. My general rule for adjusting the Radius is to start at 0.5 and move the slider up until the sharpening begins to degrade image quality, and then move back accordingly to find the best balance.
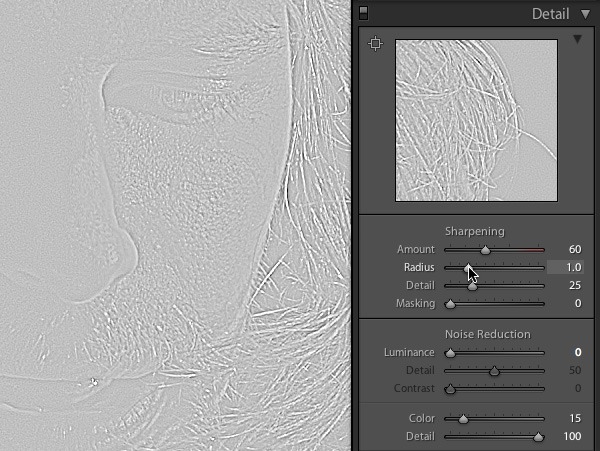
The proper Radius setting depends on a few elements, including the apparent size of details, the details you want to emphasize and those you want to minimize. In addition, the optics and sensor performance (particularly at high ISO) will play a factor in the their ability to render and record detail, respectively. Lenses with high micro-contrast will benefit from a smaller radius, while a lens that renders a more coarse image won't, for example.
Step 4 – Adjusting the Detail:
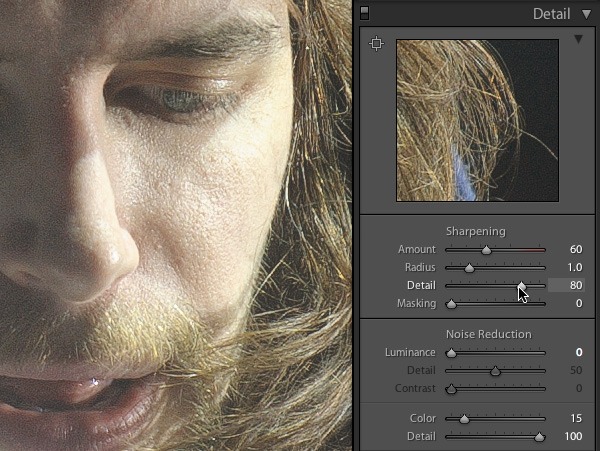
Once the proper Radius has been set, the Detail slider comes into play to fine-tune the high-frequency sharpening of the image. Similarly to finding the sweetspot for the Radius, a number of factors will determine how much detail you can – or will want to – enhance.
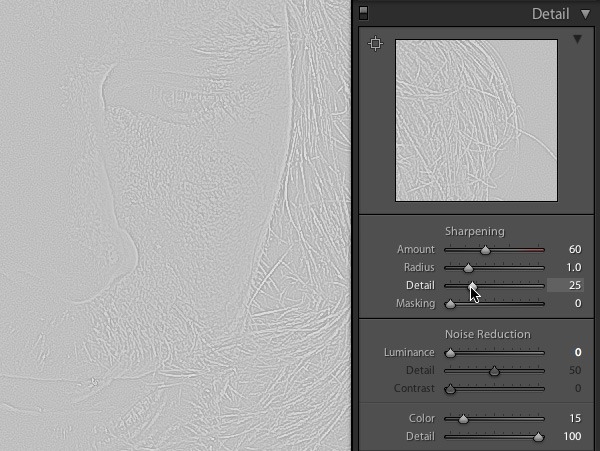
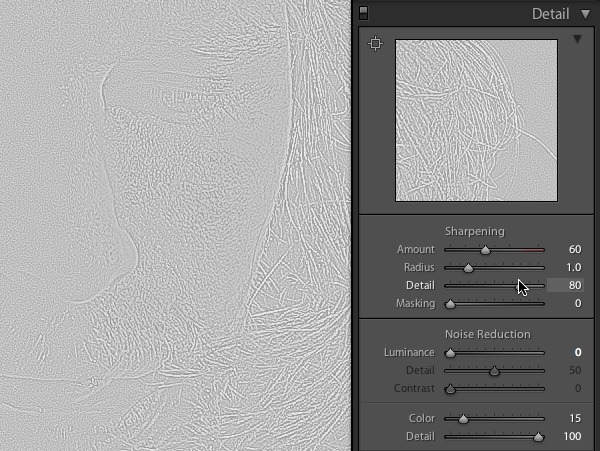
For my images, I generally prefer as much detail as possible, and will liberally crank up the Detail slider as high as possible without the introduction of artifacts.
When adjusting the Detail slider, things to watch out for include pixelization, jagged edges, and halos created by sharpening. For better or for worse, these are artifacts that will generally appear with very finely rendered details and sharp lenses.
Step 5 – Adjusting the Masking:
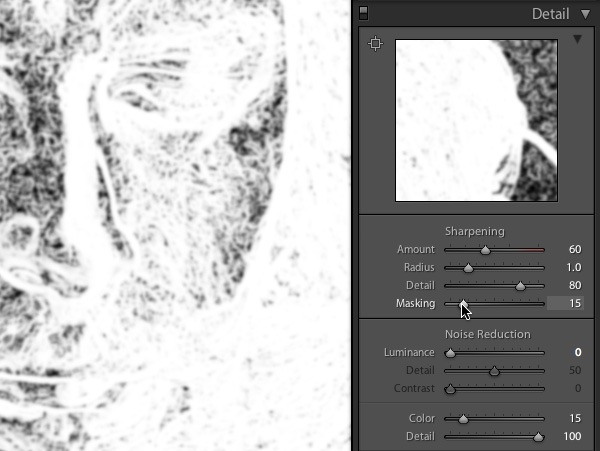
After applying the sharpening adjustments, masking is the next step. Though it's not necessary or desirable for all scenes, masking is a great way to selectively apply sharpening without enhancing noise or emphasizing unwanted details in the image.
Whether it's to keep shadow areas clean or leave skintones soft, Masking is a really nice touch that comes close to the ability to selectively sharpen in Adobe Photoshop.
Step 6 – Review & Tweaking:
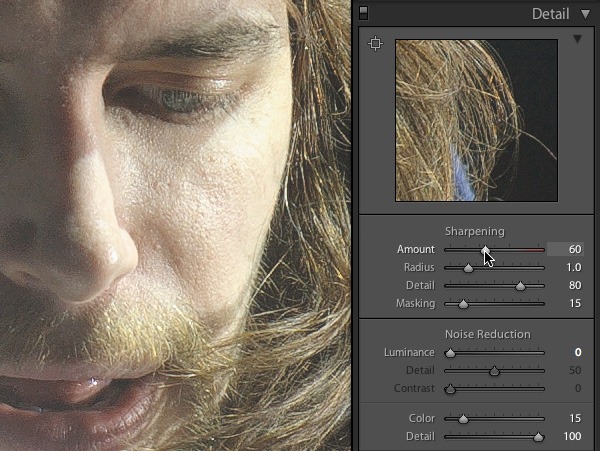
Lastly, I review the sharpness and tweak as necessary. Since all of the sharpening adjustments in Lightroom affect one another, revising and finding a the proper balance is crucial for the best results. In particular, any increase in the Detail slider from the default you used for gauging the Amount will invariably affect the perceived sharpness, and adjustment will be necessary.
The sharpening process is best viewed as a feedback loop, and your eyeballs and brain as the reflex mechanisms for finding the right mix of settings.
Before & After Comparison:
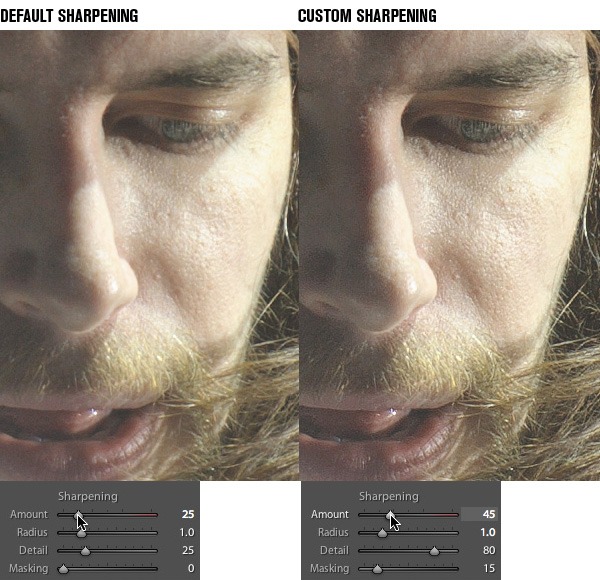
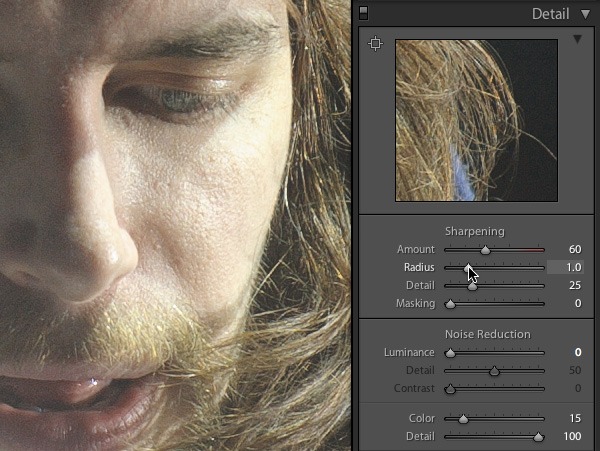
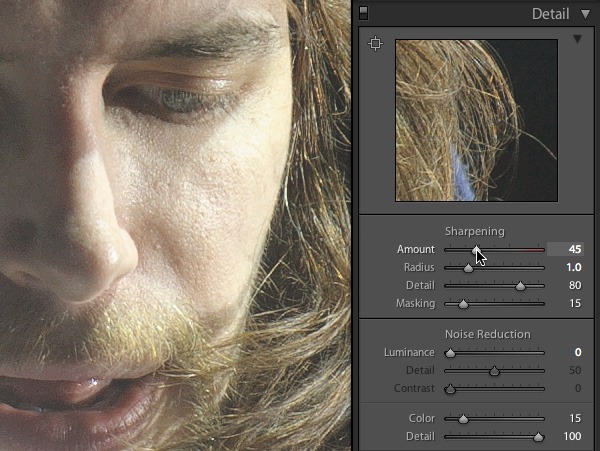
In this comparison, you can see the dramatic difference sharpening can have on a file. While the default settings are a good start, they do leave room for improvement and customized adjustments.
Just as there are no definitive sharpening settings that work for all images, different settings may work for one image as well. In this example of Girl Talk, I could easily see using a much lower Detail setting, higher masking, and a slightly higher Amount.
The beauty of Lightroom is that all of these sharpening effects are reversible and fully adjustable, so tweak away.
Summary & End Notes:
In review, the six steps we utilized in this sharpening tutorial included:
- Identifying the Details
- Adjusting the Amount
- Adjusting the Radius
- Adjusting the Detail
- Adjusting the Masking
- Review & Tweaking
In practice, the last step of review and tweaking may take several passes to achieve the best possible levels of sharpening. Ultimately, it's important to keep in mind that just like so many variables in photography, there are no perfect ideals, but only preferences.
There are no perfect sharpening settings for any given RAW file; moreover, there may be multiple ways to achieve “proper” sharpening for any given image, with different combinations of the Sharpening sliders yielding similar and equally acceptable results. In the end, you have to trust your eye to find the right balance required by each image.
If you haven't already, check out my guide to Understanding Sharpening in Adobe Lightroom for a more detailed look at how all of these adjustments work for enhancing image sharpness.
Start Playing:
Don't have Adobe Lightroom? Get it at Amazon.com or B&H Photo for cheaper than you can download it directly from Adobe. If you're not convinced, you can try the app free for 30-days by downloading the Adobe Lightroom trial.

